
It’d been a while since I fired up a BehmorA popular electric drum roaster designed for home use, with variable batch sizes (from 1/4 pound to 1 pound) and a smoke-reduction system. It has been modified and... ...more 1600 plus, and so I made a bit of a refresher course for myself out of this roast profileRoast Profile refers to the relationship between time and temperature in coffee roasting, with the endpoint being the "degree of roast". Roast profiling is the active manipulation of... ...more review. I burned through about a dozen batches (a couple of them quite literally!) before coming up with the profile outlined below, testing different roast presets and manual modes for a range of coffee origins.
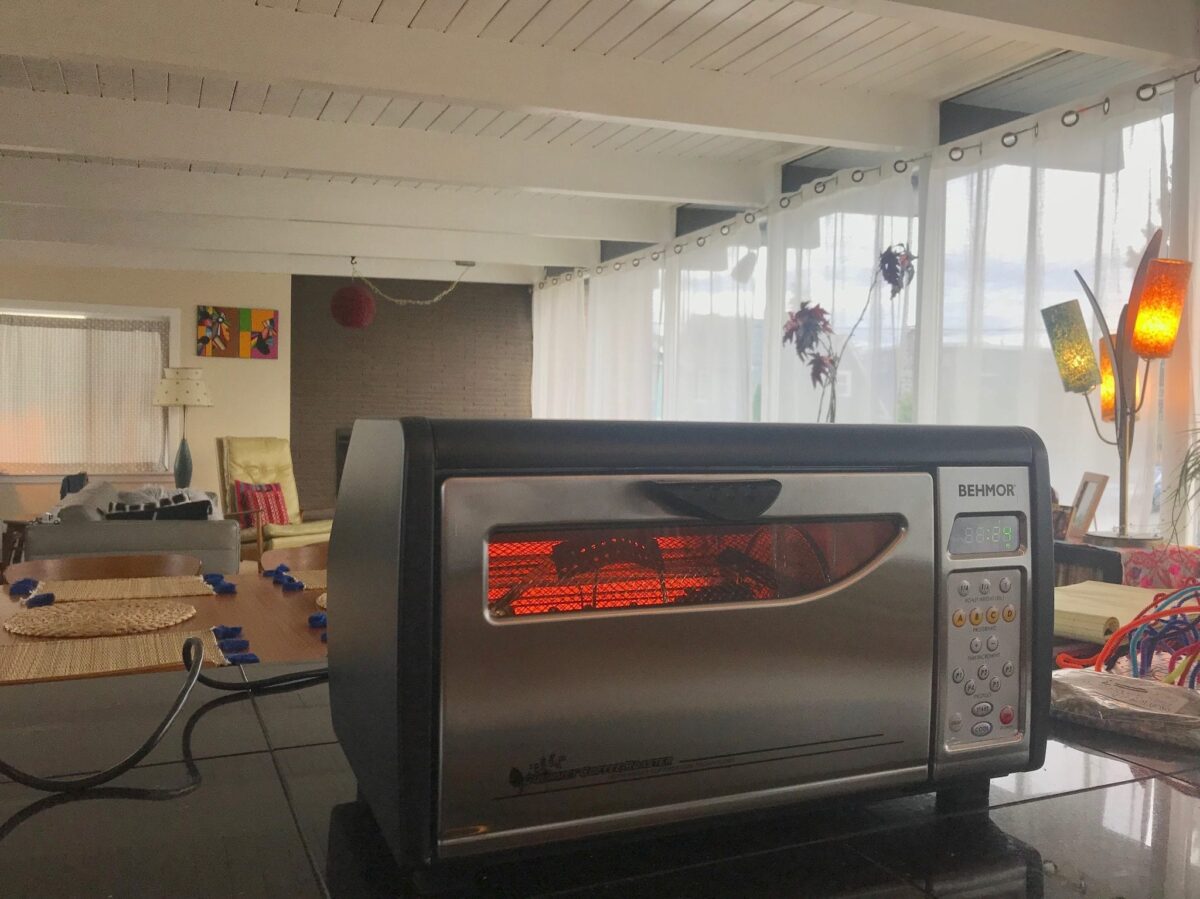
For those not familiar with the Behmor, it’s a really efficient table-top roasting machine no larger than a medium sized microwave oven, and with somewhat shared exterior aeshtetics. The interior roasting chamber houses a grid drum that rotates in front of a set of quartz heating elements that are mounted at the back of the roaster’s interior. It comes with several preset roast profiles designed to account for personal roast preference, varying bean sizes, moisture content, and densities, as well as ways to augment those profiles in order to fit specific roasting needs.
For those wanting more control over roast dynamics, you can put the machine into manual mode where you’re able to choose from five different heat settings (including turning off heat altogether), and two different drum speeds. We’ve published a few articles outlining the Behmor 1600 plus features, so I won’t go into too much detail here, and those looking for more general product information can look HERE.
I learned pretty quickly that simply going full bore with heat in manual roast mode is not necessarily a sound approach with the Behmor. As a safety precaution, the roaster completely shuts down when the temperature sits areound 325-330F, displaying an error code on the LED screen, a function I learned aobut the hard way (see comment in parenthesis in my first paragraph!). So I found myself trying to ride the outer edge of heat intensityWe have a simple scale to rate intensity in our coffee reviews, from Mild to Bold. Low intensity does not mean low quality!: We have a simple scale... ...more by intermittently changing heat application in order to avoid the disastrous over temp shutdown. It’s a bit like trying to slow a spilling cup of water – easy to overcompensate, and certainly leading to either losing too much heat or shutting the roaster off altogether.
Behmor Coffee Roaster Profile For this Coffee:
With all this in mind, I settled on trying to find a decent roast profile for Ethiopia Agaro Duromina Cooperative. In light to middle roasts, Duromina is fairly fruit forward for a wet processed Ethiopian coffee, packed with pectin sweetnessSweetness is an important positive quality in fine coffees, and is one of five basic tastes: Sour, Sweet, Salty, Bitter, Savory (Umami). In coffee, sweetness is a highly... ...more, flavors of stone fruit, and ripe citrus inherent to the coffee. I wanted to try to retain as much of that as possible, and so for roast level, I was shooting for somewhere around City+City+ roast is an ideal roast level that occurs roughly between 425 and 435 degrees Fahrenheit in many coffee roasters with a responsive bean probe where First Crack... ...more. The Behmor’s standard presets tend to err on the long side, and so I opted for the manual roast function in the hopes of speeding the roast up a bit in order to avoid flattening out Duromina’s cup complexity.
Duromina has a fairly low moisture content at right around 9.5% (10-12% is what we normally see). Low moisture coffees can be difficult to tame in the roaster, development tending to take off once all of the water evaporates, and resulting in a violent first crackFirst crack in one of two distinct heat-induced pyrolytic reactions in coffee. It is distinguished by a cracking or popping sound in the coffee, and occurs between 390... ...more (evidenced in the cup by ashyThe smell or taste of ash, such as an ashtray, cigarette smoke, or fireplace. Often a roast defect.: A quality in aroma or flavor similar to that of... ...more flavors). So one of my goals was to slow the roast down just before first crackAn audible popping sound heard during roasting. In coffee, one refers to "first crack" and "second crack," which come from two different classes of chemical reactions.: An audible... ...more, figuring the coffee would have enough charge built up to continue developing on up to City_ at the lower heat and drum speed settings. I played it fast and loose the first time around, making a rather freestyle attempt at hitting roast targets. Then I took into account the failures from that initial attempt and wrote out my final roast plan.
Putting together a simple roast plan ahead of time is helpful for me. First, I come up with a set of roast goals that I then sketch out a path of how to achieve. Most times it takes me a couple shots to get there, and I usually have to adjust my methods and expectations along the way. But writing out even the most basic roasting guidelines keeps me from shooting in the dark.
Below I’ve included the parameters for my roast in the form of minute-to-minute diagram the way, the way I wrote it on my notepad I keep next to the roaster. In order to replicate, read through the information at top to familiarize yourself with the parameters I’ve used for this particular roast. Look over my “Notes” column to see where the different roast development stages should fall (more or less), and where my heat adjustments were made. You’ll see my notes at the far right, which are what I initially jotted down before starting to roast.
**Please keep in mind that roasting experiences with this coffee may vary depending on factors such as environmental temperature, how you store your coffee, how clean the sensor is on your Behmor, etc. That said, we’ve replicated this roast on two different Behmors, the results very similar, and so hopefully yours are too.
|
**preheat the roaster without the drum inside for 1 minute on the highest preset setting P1 – have the drum pre-loaded with 200 grams of coffee, load into the warmed roaster and start your roast |
|||
|
Start the roast by hitting 1lb setting and the <start> button – enter manual mode by hitting <P5> after the initial roast is underway + press <D> button to max drum RPM speed |
|||
|
I’m cooling the roast manually here outside the Behmor; see notes below this graph on options and alternatives |
|||
|
Minute |
Heat |
Notes |
Approach |
|
1 |
162 |
*200 grams coffee *roast level: City+ *run full heat / P5 until the temp hits 320F *drop to P2 until temp gets back down to 310F *back to P5 til first signs of fracturing *reduced to P3 and slow drum before cracks to slow momentum going into first crack *let roll until snapping starts to subside (not altogether) and then hit cool *let cool for 30 seconds to halt roasting and then move to aux cooling tray |
|
|
2 |
207 |
||
|
3 |
241 |
||
|
4 |
270 |
||
|
5 |
290 |
very slight yellowing |
|
|
6 |
309 |
fully yellowing – hit 320 @ 6:30 dropped heat to P2 |
|
|
7 |
320 |
7:30 temp @ 310 raised heat back to P5 – barely tan |
|
|
8 |
297 |
browning, no signs of fracturing at the edges yet |
|
|
9 |
300 |
||
|
10 |
316 |
hear a few ‘puffs’ @ 10:15 and drop heat to P3 / slowed drum – 10:25 first crack (7:35 left on timer) |
|
|
11 |
320 |
temp still climbing 45 seconds after heat adjustment – hit cool at 11:40 (6:20 on timer) |
|
|
12 |
removed 30 seconds later – fully cool in 3 min |
||
|
13 |
|||
|
14 |
|||
A couple notes on the roast outline. First, it’s worth mentioning that the minute markers in my graph advance, whereas on the Behmor LED, the time subtracts. I tried to include both the actual roast time in minutes as well as the time on the LED readout for the notes around 1st Crack. The temperature readings are under the column labeled “Heat”, and are from the internal heat sensor (view by pressing B button), not the exhaust which generally does not change until the exhaust vents open during the cool cycle.
You’ll also notice that the temparature continues to drop between minute markers 7:30 and 8:00, even though I adjusted the heat to full blast at the start of minute 7:00. In my experience it takes at least 30 seconds for the heat to actually turn around after increasing the power to the heating coils, which is good to keep in mind when planning your roast adjustments.
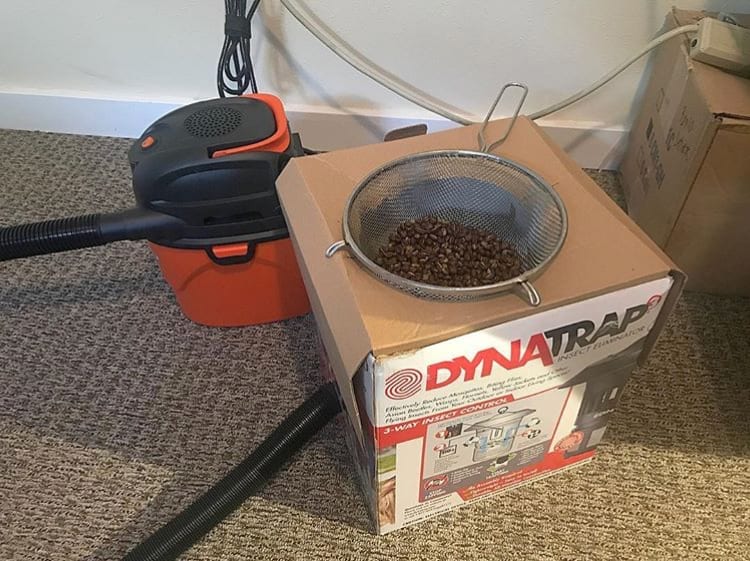
Also, I’ve made a little cooling tray to cool my roast batchOne of the most important variables in roasting coffee, the weight or volume of the coffee being put in to the roaster will dramatically affect the outcome of... ...more more quickly. The Behmor cooling cycle is on the long side (12:00 for 1LB setting), and so I’ve put together a simple cooling solution by fitting a colander inside a cardboard box, in which I’ve also cut a small hole in the bottom in order inser the nozzle of my mini shot vac. It’s surprisingly efficient, and brings your roast to room temp in just a few minutes. Make sure your hands are protected when opening a hot machine and dumping your batch (I use a pair of oven mits for protection)! And always re-insert the roast chamber immediately, and run the cool cycle to safely bring your Behmor down to room temperature.
Brewing:
This year’s Duromina is a real knockout, and in general, as long as you don’t burn it up, it’s fairly simple to pull out big sweetness and fruitedIn some coffee taster’s lexicon, “fruity” means the coffee is tainted with fruit, and “fruited” means a coffee is graced by positive fruit notes. We don't exactly see... ...more notes in the cup. Putting even just an ounce of intention behind your roasting can elevate cup results to the next level, pushing a harmonious balanceSuggests a harmony and proportion of qualities, and implies mildness since no one quality dominates.: Balance is both an obvious and slippery taste term. It implies a harmony... ...more between sweet and bittering tones, fruited complexity, and structuring acidityAcidity is a positive flavor attribute in coffee, also referred to as brightness or liveliness. It adds a brilliance to the cup, whereas low acid coffees can seem... ...more.
I brewed this roast of Duromina after 24 hours of rest using a Beehouse dripper, brew ratio of 40 grams ground coffee to 300ml of water. There’s so much stone fruit in the cup when piping hot, which normally makes tasting difficult. Apricot and peach notes are easily piced out, and you get a sense of the impending sweetness still obvuscated by heat.
Letting the cup cool for 5 minutes or so, a honeyIn coffee, honey-like sweetness is often found, but we use terms such as refined honey (highly filtered and processed) as opposed to raw honey rustic honey sweetness. This... ...more sweetness is pushed to the forefront, contrasting a minld bittering coffee flavorThe overall impression in the mouth, including the origin character as well as tastes that come from the roast.: This is the overall impression in the mouth, including... ...more, which culminates in a nicely balanced core. Top notes include Turkish apricot, dried coconut, and a perfumed orangeOrange aromatics and flavors are prized in coffee, whether they take the form of sweet orange flesh and pulp, or orange peel. Orange flavors or aromatics can range... ...more blossom floralFloral notes in coffee exemplify the connection between taste and smell. Describing the taste of a specific flower is near impossible...we always default to “it tastes like it... ...more accent. Any worries I had of flattening acidity level with long roast times proved to be unfounded, as an orange/citric aspect props up this flavor and aromatic compound. The coffee showed tremendous sweetness at this roast level, and bodyAssociated with and sensed by mouthfeel, body is sense of weight and thickness of the brew, caused by the percentage of soluble solids in the cup, including all... ...more was so silkyA mouthfeel description indicating a delicate, light, elegant softness and smoothness. Usually refers to a lighter body than terms such as velvety, or creamy. ...more and heavy on my palate.
Duromina has proven to be incredible espressoA small coffee beverage, about 20 ml, prepared on an espresso machine where pressurized hot water extracted through compressed coffee.: In its most stripped-down, basic form, this is... ...more too, and I think my next time around I’ll try dropping the heat to P2 instead of P3 to see if I can keep a steady roast progression without stalling, tacking on an extra 30 seconds of development, nearing but not hitting 330F (remember, this will turn the machine off altogether, which will likely cause scorchingPatches of discolored burn marks on the coffee bean, due to a high-heat roast environment or other roast error.: Scorching refers to a roast error that can be... ...more and ruin your roast!).
This is the first in what we plan to be a series of Behmor roast recommendations specially tailored for individual coffees on our green coffeeGreen coffee refers to the processed seed of the coffee tree fruit. Coffee is a flowering shrub that produces fruit. The seeds of the fruit are processed, roasted,... ...more list. Look out for the next one in a couple of weeks in which I’ll select a dual-use coffee, and post roast profiles for both brewed coffeeBrewed Coffee refers to all coffee preparations produced by adding non-pressurized water to coffee grounds. Contrasted with espresso coffee, which is produced under pressure, brewed coffee is primarily... ...more and espresso.
-Dan

